Boss 2
Minibosses:
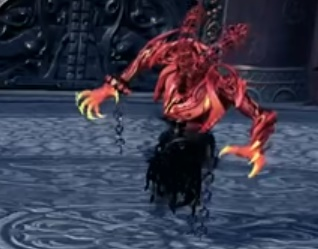
Fengsho:

HP: 610,000,000
Enrage: 4:00
Dark Thrall: 3,640,000 HP
This miniboss has very high HP for his enrage timer, but almost all the damage will be dealt to him through his mechanic.
Fengsho will periodically summon Dark Thralls around the arena, which attack like normal thralls. When brought to 1 HP, they will use Obliterate, exploding after 5 seconds applying the “Soul Damage” debuff which deals heavy damage over time to everyone in the arena, including the miniboss.

The DOT stacks and lasts for 10 seconds on players, and 20 seconds on the miniboss. The DOT deals 6,100 damage per stack every 2 seconds to players, so heavy healing is needed for this miniboss.
Kill the thralls 11-15 seconds apart from each other, make sure to coordinate which thrall you’re killing, and only bring it to 1 HP when 5 seconds are left on your debuff. The miniboss just requires a lot of healing and coordination.
Blood Thrall:
HP: 131,800,000
Enrage: 5:00
CC Bars: Immune
This miniboss boss uses normal thrall attacks, but will also constantly spawn circles around him. After a second, each circle will spawn a Nether Pulse, knocking up and damaging anyone who’s on it. Avoid the circles throughout the fight.
At 90%, 60% and 30% HP, the thrall will become invulnerable and 2 Eluvium Sentinel statues will come to life. These statues need to be CC’d, grabbed/gripped and pulled to the center circle to remove the shield.
Once all the statues are in the center, Blood Thrall will tether 3 random players which deals 17,800 damage over time per second to them, who should run to the edges of the room to remove the tether.
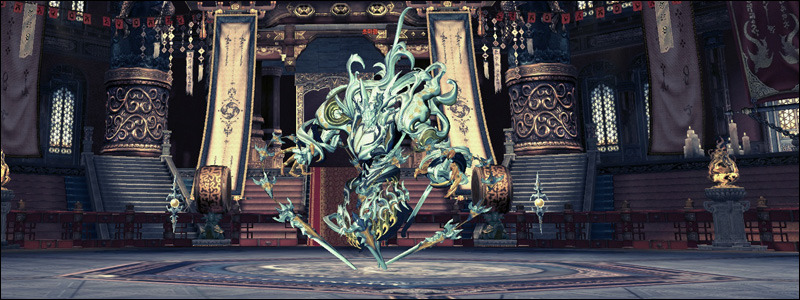
Boss: Great Thrall
HP: 1,356,800,000
Enrage: 10:00
CC Bars: 8x
This boss is considered the easiest boss. Almost all of the boss’s HP will be dealt to itself by mechanics, and relies only on the tank.
Attack Pattern:
Hellfire + Waveform -> Double Swipe -> Slow Field + Uppercut -> Punishment -> Time Distortion -> Slow Field + Uppercut -> Punishment -> Time Distortion -> Slow Field + Uppercut
If the tank stands 10 meters or farther, the boss will do a gesture and the tank will receive massive damage and lose aggro.
Hellfire + Waveform
When you engage Great Thrall, it will give the Hellfire debuff to the farthest 3 people, and the Waveform debuff to the closest person.

Hellfire will instantly kill you after 45 seconds if you do not enter soul separation.
Anybody who goes into soul separation will have their aggro reset, so the tank must not get Hellfire. Everyone else must make sure to be farther than the tank.
Hellfire will be reapplied to the farthest 3 people as soon as it is removed or expires from all players who have it.
Waveform:
Waveform is a time bomb that only does damage to people in soul separation. It looks like this in soul separation if you have characters on. It explodes immediately after the first slow field + uppercut in the attack rotation.
It does damage over a few seconds with several hits, so you want long duration iframes such as frost sheath by force master or destroyer, or simply block them.
Double Swipe:
Slashes twice with claws, nothing special.

Slow Field + Uppercut:
The boss throws a field at the tank’s location that severely reduces movement speed to anyone who steps in it. It then throws a linear energy wave in front of it, this merely does damage.

Punishment
This pattern is the same as the Raven King’s, but you do not get the ground indicator, you have to watch the boss’s animation. You must physically avoid this attack, getting hit or iframing applies the “Bleed” debuff which deals 6,200 damage over time per 2 seconds over 60 seconds.
Both hands lifted up = Out/In
One arm down one arm up = In/Out

OR
Time Distortion:
The boss is CCable during this attack.
If you stun it, then it will just continue its attack pattern
If you knockdown it, then it will rise up and send everyone facing it into Soul Separation
If you are facing it while you are in soul separation, you will instead be sent out of soul separation.
If you are sent into soul separation with a Hellfire debuff, the debuff will be removed and you will gain a stacking Perpetuity buff that increases Attack Power and Critical Damage, and stacks higher while you’re in soul separation. You will also gain the Soul Separation debuff for 2 minutes, once that expires you will die.

If you are sent into soul separation without a Hellfire debuff, you will instead have significantly reduced damage while in soul separation, but as the nuke mechanic will deal most of the damage to the boss, this is not very relevant.
While in soul separation, the Punishment attacks will not hit you, but the boss will spawn lines of dark pits around him. Standing in these pits when they explode will do extremely heavy damage and daze, and probably one shot you.
Soul Separation Tactics
The one thing you have to keep in mind, the tank cannot get Hellfire. The easiest way to do this is to just have entire parties rotate in and out of soul separation.
At the start, only party 1 (with the tank) engage, and party 2 stands at the edge until they get the Hellfire buff. Each phase has two Time Distortions, so one must be stunned and the other knocked down. The order does not matter, but you must be consistent. In the first phase, party 1 goes in while party 2 faces away, and alternates for every knockdown after. Tank must always face away.
Every knockdown phase, everyone but the tank should face the boss to swap positions. The alliance view should look like this

This seems inefficient since people will get damage down, but the nuke mechanic will do more than enough damage to make up for it, and this is far simpler than alternative strategies.
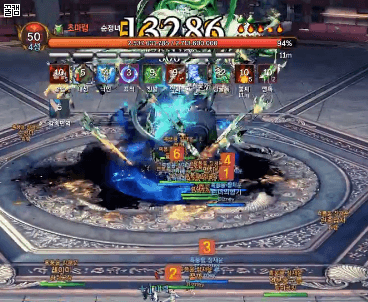
Wraithwell Cores:
There are six Wraithwell Cores on the map. After applying the fourth Hellfire, a message warns “The Wraithwell Cores have been reset” and the Cores will activate, turn white, and start healing the boss.


The boss will apply the “Trace” buff onto the tank, and start repeatedly creating a 120 degree Trace field in the direction of the Traced target. During this he will still do his normal attacks. If the tank dies then the cones will stop being produced.


If you are in the real world, the field will instantly kill you if you do not have the Trace buff. If you are in soul separation, the field will just deal heavy damage.
If the Trace cone hits the Wraithwell Core, it will turn black and deal massive damage over time to the boss. Once all Cores are black, a message warns “All Wraithwell Cores have gone dark and are attacking the Great Thrall.” The following chart shows the positions of how to turn the Cores black.
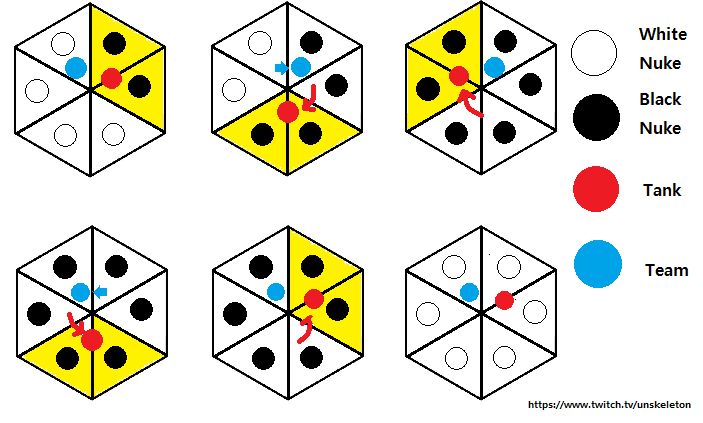
Yellow area is the 120 degree aoe on the tank.
At the start of the phase, the tank will be at 2:00, and the rest of the raid at 11:00. The tank will move clockwise for the first three clones, then stay there after all cores are lit. The raid must move accordingly.
After 6 Trace cones are fired, Trace is removed and the Wraithwell Cores will turn back to white.
The boss will still be performing its attack pattern and other mechanics during all of this, so keep doing everything the same.
At 12% HP, a message warns “The Great Thrall is out of control” and all the Wraithwell Cores will permanently deactivate and stop giving the Trace buff. The boss will continue to do normal attacks until it dies.
Cheese Strategy:
This strategy is slower than everyone DPSing the boss, but is significantly safer as only the tank needs to do anything.
At the start, only the tank goes on the boss. Everyone else hits the boss once so tank doesn’t get Hellfire, and then stands on the edges of the room. Revive anyone who dies to Hellfire.
Alternatively, send two or more people going in one-by-one. Everyone stands at the corner. The lone person will get Hellfire, once Trace expires (after 6 cones or less than 10 seconds left of Hellfire) they must run to where everyone else is, die, and get revived while the next person goes in.
The Wraithwell Core mechanic will bring the Great Thrall down to 12% HP. When people die to Hellfire on the edges, the other people near them should revive the dead people. When the boss reaches 12% HP and the Cores stop doing damage everyone goes in and bursts the boss.