Spell Timer Overlay Tutorial by Fiorinol Ririnori Version 2.0 (August 22th 2018)

Clean Overlays!

Now with Raid Buffs!
This guide will walk you through installing the Special SpellTimer (SupeSupe) plugin for the Advanced Combat Tracker (ACT) on Windows 10 (Sadly, this plugin doesn’t work on any other operating system), making overlay timers for your dots, hots, ability cooldowns, and have audio cues for your cooldowns. This can help some players keep track of their cooldowns, and even other people’s cooldowns, such as raid buffs, swiftcasts, and the like more easily.
The examples presented in this tutorial are simple scenarios for White Mage, I think White Mage showcases well the different possible scenarios you can use Spell Timer for, but can be adapted to other jobs. I’ve also made another example recently using raid buffs, which will track a variety of raid dps buffs in your party, including from yourself!
Resources
There are many downloads required in this tutorial, I will list all of them here, but I will still link them during the steps of the tutorial:
- Visual Studio Redistributable
- Net Framework 4.7.2
- Hojoring (Contains the Spell Timer plugin)
- 7zip (If you don’t have a program that can unzip .7z files)
- Job Icons
- Basic White Mage Timers
- (Optional) Raid Buff Timers
Installing and Setup
- You’re going to need to download and install a Visual Studio Redistributable and Net Framework 4.7.2.
- Make sure that your ACT reads your combat logs properly through Network mode. If you don’t have an accurate read on your combat logs, SupeSupe won’t work properly.
- Nowadays, SupeSupe comes bundled with Hojoring, which includes 3 ACT plugins; SupeSupe (This is what we’ll use for the overlays), Ultra Scouter (Gives you enhanced overlays for targets, focus target, we won’t use this), and TTS Yukkuri (Which is a less grating Text to Speech for ACT with Discord features). You can download Hojoring here.
- Don’t be intimidated by all the Japanese text. There should be a link in the page as pictured below;

Make sure to dowload the ACT.Hojoring .7z file;

- Extract the files (If you can’t extract 7z files, you can download and install 7zip) into a folder that you know won’t change. In my case, I made a folder directly under the C: drive; C:\Hojoring

Don’t forget to unblock the compressed file before unzipping it in the file properties!
You might have issues installing otherwise.

- In ACT, browse to the folder you extracted Hojoring into and add ACT.SpecialSpellTimer.dll to ACT.
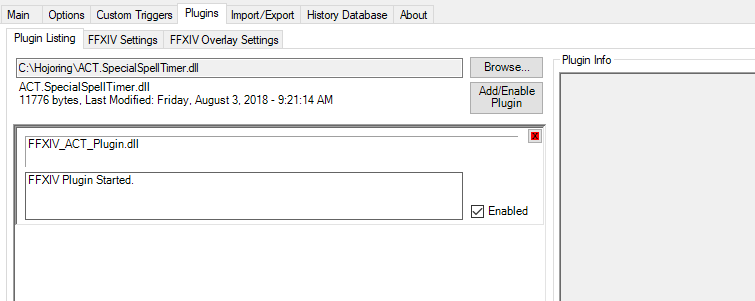
- In the Plugins section, a new tab should appear for SupeSupe, as well as a Hojoring splash screen when you enable the plugin. Go into it, and the first thing we will do is change the language to English. Reading is good. I like being able to read. After changing this setting, make sure to restart ACT.

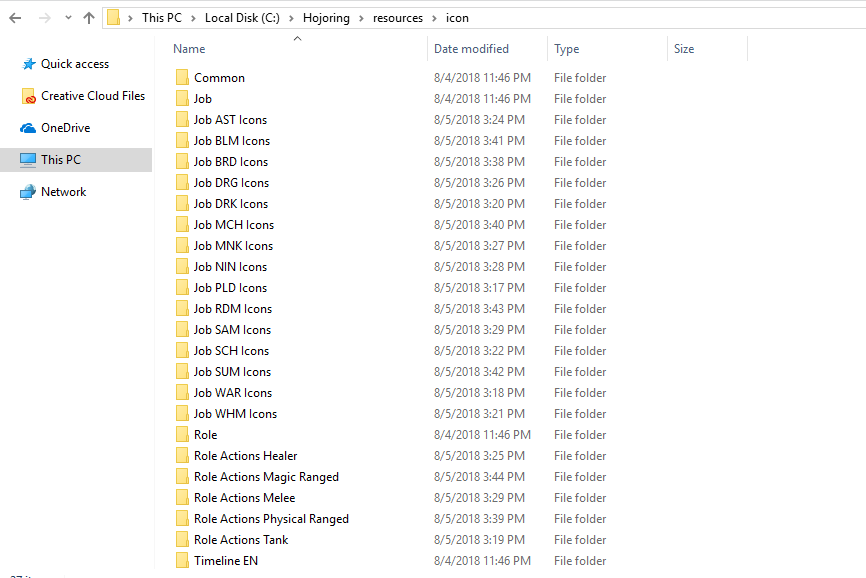
- We might want to have some icons for our spells in our overlays, I gathered all of the job/role icons into one zip file, unzip this into your Hojoring folder, in resources\icon, like so;
- I also made a care package showcasing basic examples in the spell timer. We will import this straight into the Spells tab in the Triggers tab by right clicking the empty background;
- The timers should “Just work”. Depending on how big your display is, you might want to adjust the location of the panels. For instance, if you want to change the location of the “Damage” panel, click on the Damage panel and change its location. You can get a pretty good idea of how the spell timer part of the plugin works from those few examples. You can also adapt it for other jobs that you play.
Raid Buffs
This is an extra step I’ve added to this version of the guide. This is the same as Step 17 above, except that you import this list instead, and it should give you an overlay with some raid icons. I’ve updated the icon pack recently, so if you have the old one, I’d suggest overwriting them with the new one, I’ve added icons with borders for the raid buffs.
These should work as-is (including the icons if you put them in the right folder), but I’m assuming that you only have each of one job in your composition; if you have two dragoon in your party and they both use Battle Litany, they will both reset the cooldown of the overlay. However, these triggers required that you have a full Battle Log in-game. I need to fix up the IDs later.
If you already know the composition of your raid group, you can remove the abilities you don’t need by unchecking them in the list. I’ve also taken the liberty of ordering the buffs by cooldown; start with the longest cooldowns on the left, going to the shortest one being Trick Attack.
You can whether the layout is horizontal or vertical by checking the “Horizontal Layout” option in the “Raid Buffs” panel, as well as adjust the sort order, the location of the panel (You can also move it around on the screen by unchecking the clickthrough option on the left-hand side at the bottom), and if you feel a bit spicier, you can try your hand at the “Advanced Layout” tab.

General Panel
This is the panel where you can adjust various settings, such as how the overlay displays the text for the spell, and the conditions that must be fulfilled for the timer to show.
Spell Name
Shows what will appear in the overlay, for Aero II, the name of the spell, followed by the victim will appear. So if I Aero II a boar, it will show as “Aero II ➧ Boar”.
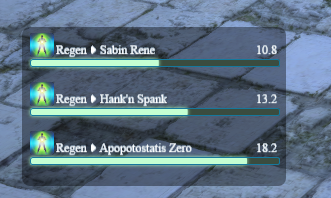
I become an instance
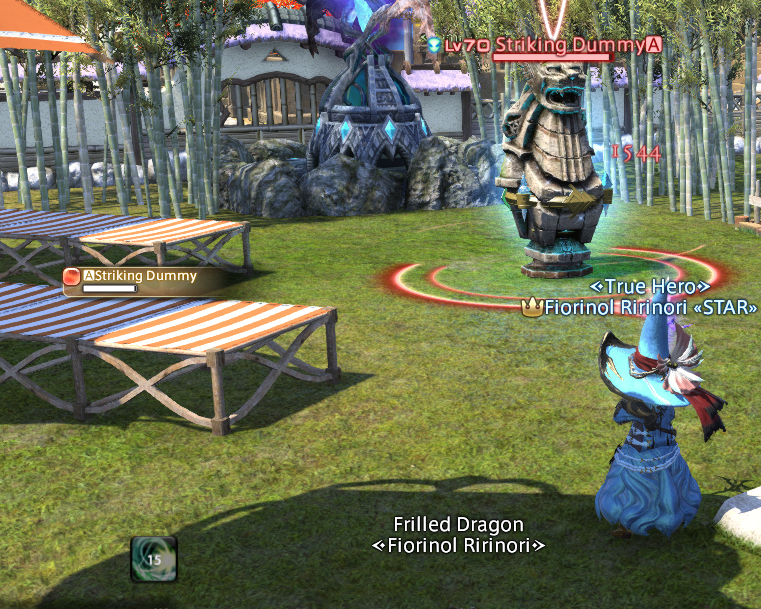
This checkbox defines if you want multiple instances of the same box to appear if it’s cast on different targets. It is used for Regen in the example and gives a result as such;
However, you likely don’t want this for something like Aero III on certain encounters, for example, the adds on Phantom Train, as the overlay will roll off the screen from the sheer amount of mobs.
Keyword to Show
This is what causes the overlay to trigger. It uses the combat log, you also want to enable “Use Regex” as you will use it most of the time. You need to feed it something from the combat log. For instance;
1A:(?<victim>.+?) gains the effect of Aero II from <mex>
Will capture the name of the target, and specify that Aero II needs to come from you to trigger.
1A:<mex> gains the effect of Surecast from <mex>
Ensures that this triggers when you cast Surecast only when it comes from yourself.
1A:<pc> gains the effect of Divine Benison from <mex>
Ensures that this triggers when you cast Divine Benison on a player character in your party. You can even do this with specific roles;
1A:<TANK> gains the effect of Regen from <mex>
So that the Regen timer only triggers when cast on a tank. If you want the Tank’s name to show up in the overlay, you would set the spell name to Regen -> ${_tank}
On top of using Regex expressions like showcased in Aero II, there are pre-defined keywords you can use;
<mex> for yourself
<nex> for anyone in your party except yourself
<pc> for anyone in your party including yourself
<TANK> <HEALER> <DPS> <MELEE> <RANGED> <MAGIC> for all the different roles
<PLD> <WAR> <DRK> <BRD> <MNK> etc… for all the different jobs
You can also combine the roles/jobs with a number, for instance, <TANK1> is the first tank in your party list.
When you use a keyword and want to show it in the spell name or use it in keyword to extend, you need to precede it with an underscore like this: ${_tank}
You can also capture more than one spell with their respective durations doing something like this;
1A:(?<victim>.+?) gains the effect of (?<effect>Regen|Medica II) from <mex> for (?<duration>[0-9\.]+)
Recast Time
The amount of time on the timer once triggered. You can also leave this to 0 and capture the duration directly in keyword to show. For example;
1A:(?<victim>.+?) gains the effect of Regen from <mex> for (?<duration>[0-9\.]+)
This can be combined with (?<effect>) so one trigger can handle multiple spells dynamically along with their respective durations.
This can be whatever time you want, for instance, the Surecast example has a timer to count when it’s off cooldown again (Yes, I used Surecast as an example to showcase this as Presence of Mind takes a whopping 2.5 minutes to be off cooldown, and largesse 1.5)
Keyword to Extend
These are conditions upon which the timer changes. One example of this would be shields. You probably don’t want your shield timer to still show if removed, such as;
<pc> loses the effect of Divine Benison from <mex>
When this is triggered, we remove 15 seconds off the timer, effectively ending the timer, indicating that the shield was consumed. A very good example of how you can use this feature is Iron Jaws on BRD, which refreshes both Caustic Bite and Stormbite.
There are various other options you can change and fiddle with, such as the timer changing colors upon reaching a certain amount of seconds, or filters for specific jobs/zones. But this is the basics, feel free to fiddle with it.
Visuals

There are many things you change do in this panel. Such as the font, colors, and size of the overlay elements. I’ve set the font to Times New Roman in the examples as it’s a font most people have already installed on their computers.
I prefer Myriad Pro at size 14 myself, as it’s fairly close to the font used in-game. The colors in the example are the ones I use. If you change the icon, you will have all the icons from the icon pack you downloaded earlier available separated by job/role.
Another thing that’s interesting is that while you’re in the visual panel, it will show you an example of that specific spell on the overlay along with a grid. You can have the same effect but with multiple timers if you click the wrench next to their name.

Many of the options are self-explanatory, but I’ll go over two of them.
Reverse Direction
This simply reverses the timer from filling up to counting down. If your spell is 30 seconds, instead of counting up to 30, it will count down from 30 to 0.
Always Show
This will always show your overlay element, even when the timer is finished. This is very useful when you want to drag the overlay element. However, to do this, you need to turn off the Clickthrough option at the bottom of the left hand side of the screen;

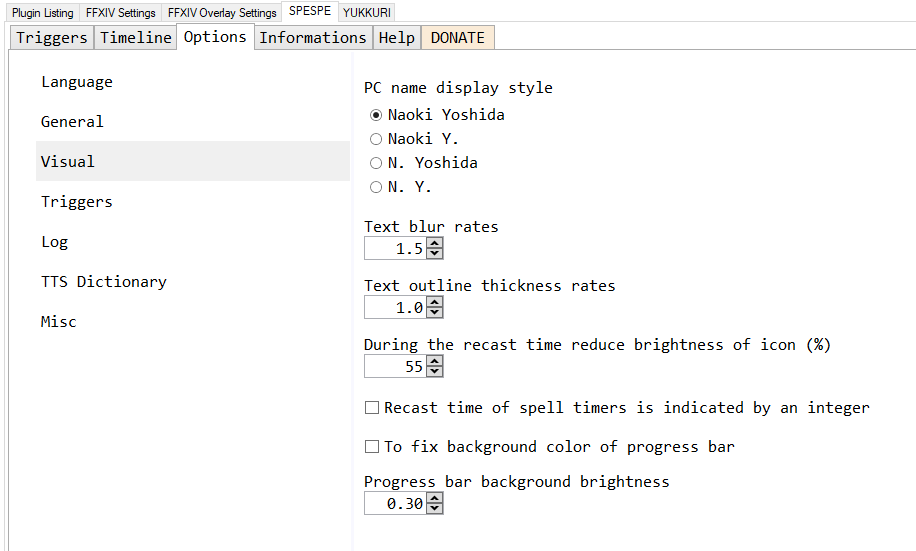
Text Blur, Display Names and Decimal Timers
Maybe this is a pet peeve of mine, but I don’t like the default text settings the plugin comes with. Some of the options for the text, you will find in Options and Visuals tabs. You can increase how much the text is blurred and how thick the outlines are. I like to have 1.5 blur myself as it makes the text more palatable against some backgrounds. You can also change the display name style in this panel, as well as make your timers count down using whole numbers instead of decimals. Feel free to experiment until you have something to your liking.

Without the blur

With the blur, much better!
Notice
This panel is useful if you forget to refresh your dots or forget to use important cooldowns when they’re up (like me!). You will get a horrible text to speech voice to yell at you to remind you to use your spells, or a noise, if you’re more inclined towards that.
The panels go in this order, from left to right;
Notice when log matches
When the timer is triggered.
Notice when log matches (Delay until notify)
X seconds after the timer is triggered
Notice when log matches (Before notify)
X seconds before the timer finishes
Notice when timer expires
When the timer ends
So for instance, if I want the timer to remind me about Presence of Mind 10 seconds before it’s up again, I would set 10 seconds on the third panel (Before notify), along with a Text To Speech notification or a sound notification.
You can also change the text to speech to something less irritating using the Yukkuri TTS plugin that comes with Hojoring. Sadly, most of the TTS available is in Japanese. The options available in English are mostly paid services like Amazon Polly. You don’t need the Yukkuri TTS for basic Text to Speech to work however.
Other Things of Interest;
Informations Tab
The “Informations” tab can give you useful information about what the keywords I mentioned above do exactly in regards to your party, as well as the currently active triggers.

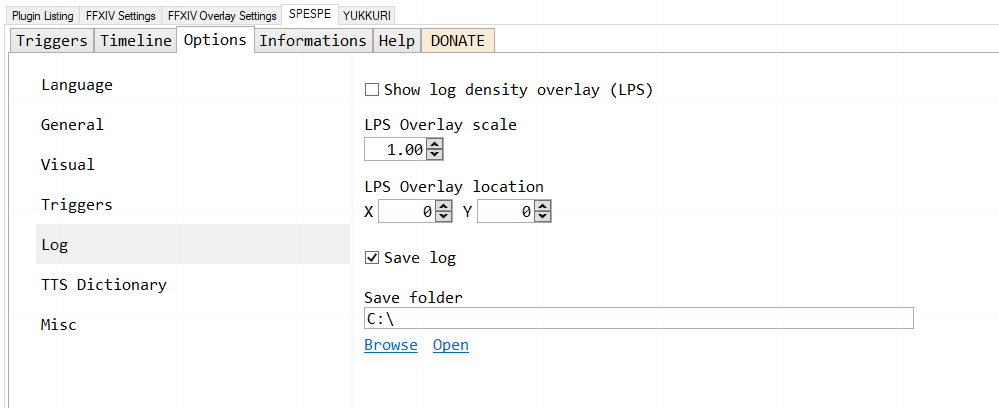
Saving the SupeSupe Log
If one of your timers doesn’t work, you can save the SupeSupe action log to analyze it. SupeSupe cuts up ACT’s logs and uses those cuts for triggers. There are some particularities to some spells, for example, “Presence of Mind” shows up as “Presence Of Mind” in the log, a simple typo can make your timer not function. Checking the log can give you a good idea of what’s not working in your timers.

Icons more like those in the game
You don’t need to have progress bars like what’s shown in the examples. You can use the following settings to have just the icon with a timer (Don’t forget to set the background fill color to transparent!);

If you want icons more like what’s in the game as well, feel free to use this frame and incorporate your spell icons in it, as such;

Nice Aero II Icon!
This should cover the basics for SupeSupe’s Spell Timer. There are a lot of things you can do with it, but I wanted this guide to be as simple as possible. I might make a tutorial later for one of SupeSupe’s features; the raid timeline and overlay, it is much more appropriate for raid bosses than making an individual timer for each mechanic, and how to use Yukkuri TTS to have Discord callouts.