In Final Fantasy 14, there are a ton of ways you can customize and create your character. From the role of your player in a group to their race, class, job, and clothing, every aspect is varied enough that no two characters will ever be the same.
One of the more exciting forms of customization is the Resistance Weapons. First brought into the game with the Shadowbringers expansion, Resistance Weapons are powerful items that can evolve and upgrade over time, becoming more robust and useful in combat.
In this guide, I’ll be going through the step-by-step process of how you can find these weapons and get them to their highest level.
So, without further ado, let’s get started!
Getting Started
So, first off, before you can even start the process of getting any of these weapons, you’re going to need to complete a few prerequisites.
- Complete the Shadowbringers Questline up to 5.4
- Complete the raid series, Return to Ivalice
Essentially, both are directly tied to Resistance Weapons as a whole. The Shadowbringers questline is the main storyline that introduces them into the game. At the same time, the Return to Ivalice is a direct sequel and officially opens the game up for you to get the items for you and your character.
Once you’ve finished those prerequisites, now it’s time to get started with the process of actually acquiring the weapon.
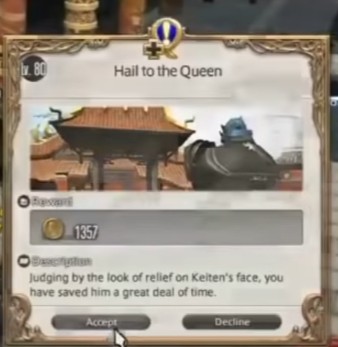
Quest #1. Hail to the Queen
This quest starts in Kugane at Keiten and is fairly simple. After completing the “Hail to the Queen” questline, the first weapon resistance weapon you’ll obtain. For the sake of reducing spoilers, I’ll try to be as light as possible on what the quests involve.
In this instance, you’re doing several very simple tasks of interacting with a few people. After completing the quest, you’ll get your first base resistance weapon.

Later, after you have completed this questline and gotten the resistance weapon, you’ll be able to purchase them on the market. Each costs 4 Thavnairian Scalepowders. Each of these powders costs around 250 Tomesstones of Poetics.
Quest #2. Where Eagles Nest
This next questline is the foundation for all resistance weapon questlines and unlocks the Bozjan Front. This is an adventuring area where there are 1v1 and raid skirmishes. You’ll need to work on both areas since they are both important for your game completion. X:6 Y:6 coordinates. Start this quest at Marzaq.
Quest #3. A Sober Proposal
After you first unlock the Bozjan Front quest option, don’t take it. Instead, speak with Gerolt and complete the questline, A Sober Proposal. This will allow you to build up your resistance weapon and strengthen it before going into the Bozjan Front.

Quest #4. For Want of a Memory
Once you’ve completed this, you’ll get the Zlatan-based quest, For Want of a Memory. The quest will only be completed after acquiring 20 Tortured Memories, 20 Sorrowful Memories, and 20 Harrowing Memories. These can be obtained through two separate methods.
First, you can go to the Heavensward to acquire FATEs. These have a 100% drop rate though the memories are in different locations.
- Tortured Memories can be found in Coerthas Western and Sea of Clouds
- Sorrowful Memories can be found in the Forelands and Churning Mists
- Harrowing Memories can be found in the Hinterlands as well as the Azys Lla FATEs

Since there is a 100% drop rate, you can use these locations to farm memories so that you can get more resistance weapons later. You can also use it as a quick supplement to whatever number of memories you may be missing at the time.
You can also defeat Bozja monsters on the southern front. This requires that you’ve already completed the Bozja questline and is made up of 3 different zones.
- Zone 1 (Southern) has monsters with Tortured Memories
- Zone 2 (Middle) has monsters with Sorrowful Memories
- Zone 3 (Northern) has monsters with Harrowing Memories
While it may be a bit of a pain to get access to, once you have free reign over all three areas, it’s very simple to get more than enough memories of each section.
After you’ve gotten all of the memories, head back to Zlatan, and you’ll upgrade your weapon while also getting access to a new upgrade quest.
Quest #5. The Will to Resist
This is very similar to the last quest, except you’ll be acquiring Bitter Memories instead of the others. While there are a few different options for getting them, the easiest is just back to the Southern Front and farm the monsters. Here, all of them have Bitter Memories rather than being based on the location. This makes the process even easier to accomplish overall.
Turn these six memories in, and you’ve completed this part of the quest.
Quest #6. A Sign of What’s to Come
This questline only opens up after you’ve finished almost all of the Southern Front Bozjan quests and opens up a new raid called the Delubrum Reginae. You’ll need to at least beat this on the “Normal” difficulty setting to unlock the next relic step.
Quest #7. In the Queen’s Image
This is offered after completing the prior quests. It immediately offers the resistance weapon upgrade quest, Change of Arms, which will require that you get 15 Loathsome Memories. The best way to acquire these is just through the Castrum Lacus Litore, which is part of the MSQ. This drops 5 LMs per run and can be gone through several times.

You can also get Loathsome Memories by farming the Southern Front again, though this time, you’ll only get them from Critical Engagements and only occasionally.
After you have all 15, you can move to the next quest.
Quest #8. The Resistance Remembers
This is a one-time quest that’s only for your initial resistance weapon. It’s going to require 18 Haunting Memories and 18 Vexatious Memories. They are both found in the Heavensward. You can get HMs from the Gyr Abania FATEs, while the VMs can be found in the Far East FATEs(such as Ruby Sea)
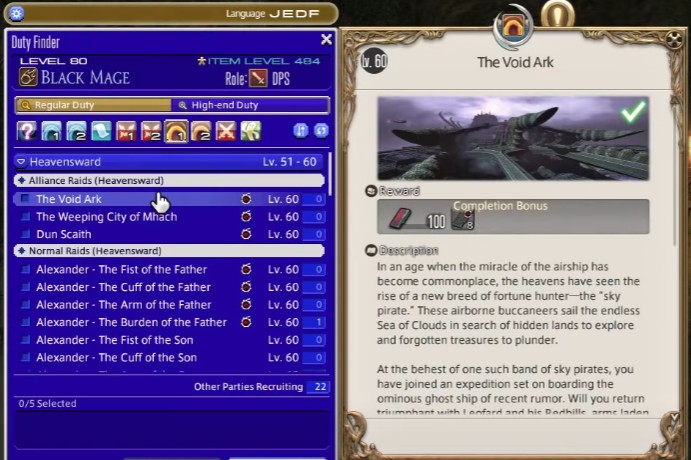
You can also do the Heavenswards alliance raids such as Void Ark for the haunting memories.

Turn in all of these memories, and you’ll unlock the next quest.
Quest #9. A New Path to Resistance
Here, you’ll need to collect 15 Timeworn Artifacts to progress. You can get these in one of two locations.
The first is the Palace of the Dead. This will give you a chance at dropping an artifact every ten floors. While this isn’t a 100% drop rate at the lower floors, it does increase over time. Floors 150+ do have a 100% chance, though they are very difficult locations to beat and require a team.
The second location is from the Delubrum Reginae run. This offers an artifact per run on normal difficulty. Just be aware that if your team isn’t specialized for this raid, you’re not going to be able to fun through this as fast as you’d like.
Either way, with time and focus, you can get all 15 artifacts. Once you do, return them, and you’ll enter the final questline to fully complete your weapon’s upgrades.
Quest #10. A New Playing Field
This is the start of the main questline in this area, however, like with the Southern Front, instead of immediately jumping in, speak with Gerolt to get the Weapon Resistance queests.
The first one you’ll get is What Dreams are Made of, and it is a one-time quest. Completing it will open up three more quests, Spare Parts, Tell Me a Story, and A Fond Memory. All are one-off quests that require 30 of 2 different items each before they are considered complete.
To get the first item for each area, head to the newly opened area, Zadnor. There, you’ll have three different zones to access. You’ll get the Spare Parts items from Zone 1, the TMAS items from Zone 2, and the AFM items from Zone 3. Each zone will give you both items based on the enemies. Critical Engagements will give you one item, while general skirmishes will give you the other.
After completing this, you’ll open up the final quest that will be required for every subsequent resistance weapon.
Quest #11. Irresistible
This requires 15 Raw Emotions. You can get them from running through Dalriadab, Delubrum Reginae, or through the level 70 dungeon.
Now that you have completed these 15, you’re done! Go and speak with Gerolt, and he will unlock your weapon fully.
While you’ll have to follow through with many of these steps to upgrade other resistance weapons, you can always return to this breakdown and go over the different areas you’ll need to explore.